
My Nontoxic Cookware post has been one of my most read posts on the blog and I know many of you are making the switch to detox out your cookware! Unfortunately, I think it’s easy to feel a little intimidated when it comes to cooking with some of the nontoxic options that are out there as you do have to change how you cook. Specifically, using waterless cookware can be so different than what you are currently using to cook with. No worries…I am going to share all the tips and tricks for cooking with waterless cookware – specifically one of my favorite non toxic cookware brands 360 Waterless Cookware – so you can feel confident in investing in this awesome brand for your family!
*Affiliate Disclosure: I do have affiliate links in this blog post. If you purchase something from my link, I will receive a small commission from the sale. This comes at no cost to you but is paid by the company. I do not take becoming an affiliate with any company lightly. If I am, it’s because I believe in the company and their product.
What is waterless cookware?
Waterless cookware uses a technology called Vapor Technology to cook your food at lower temperatures. When you cook your food at lower temperatures you are not only increasing the flavors but protecting all the nutrients in the food. Yielding higher nutrients in your cooked food once they’re done. Not only does it heat your food at lower temperatures but it also does it quicker! Yes, in this case you can have the best of both worlds. You are cooking the food in it’s own juices so you don’t need the added oils, butters, etc like you would with other cookware.
The lids of 360 Cookware are specially designed to create a Vapor Seal that encapsulates the heat and moves it around the food to cook it. Instead of overcooked, low nutrient food, with bland taste, you are left with nutrient dense flavorful food! I can attest to the magic of waterless cookware after using 360 cookware myself- more on this brand in my full review here. If you prefer to cook as you always have you can still do that with 360 Cookware too. You don’t have to use the waterless cookware method but once you learn it you won’t want to go back!
Benefits of Waterless Cookware
Waterless cookware has definite benefits to its use. First, and most importantly to me, is that by cooking without adding water and at a lower heat, this cooking style is able to maintain and protect the nutrients in the food. If we are going to do the work to invest in organic vegetables, grass fed and finished meat, etc we want all those amazing nutrients in the foods to be available to our bodies when we eat them. And with waterless cookware, they are more readily available than traditional cooking methods! (1) Secondly, it requires no added oil, butter, etc. Some say this is healthier due to less calories or fat being added into your food. If it’s the right kind of fat that doesn’t bother me, but for some this may matter! Thirdly, cooking with waterless cookware is more energy efficient. Only low heat is used and some brands even work by sealing in the heat and turning off the stovetop once a certain level is reached. Lastly, and certainly not least, when it comes to 360 Cookware, this is a true nontoxic cookware option. No worries about crazy chemicals leaching into your food! And they are so serious about being green, sustainable and eco-friendly. (2)
Waterless Cookware Methods
The directions for waterless cookware that I am going to share will be specific to the 360 Cookware, as it can vary slightly from brand to brand. Simply follow the directions below and you will know you will have nutrient dense, flavorful food made with nontoxic cookware!
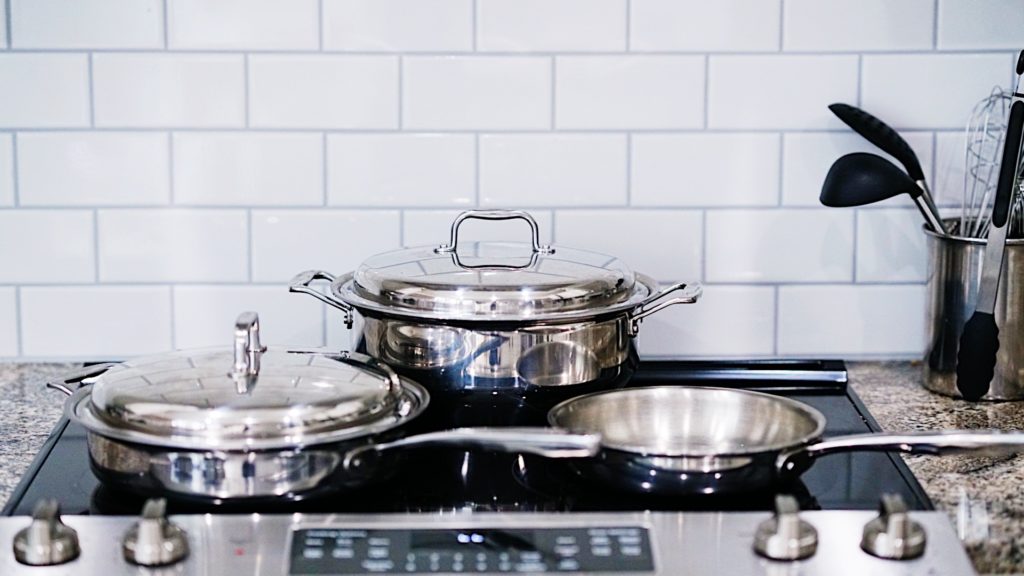
- You will need to choose the right size pot or pan to use. It will need to be at least ⅔ full of the food you are cooking.
- Use the correct size burner. The burner should be approximately the same size as the diameter of the bottom of the pan you are using.
- Place the food in the correct size pan (that has been pre-heated) and place the cover on (the pre-heat is so important).
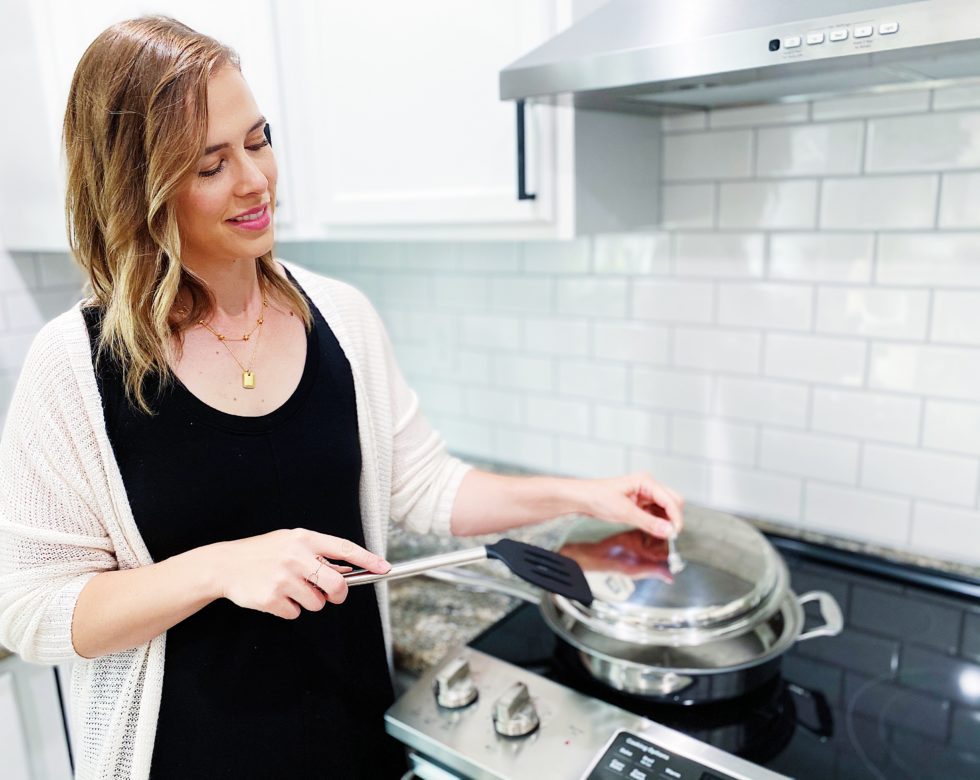
- After approximately 3-5 minutes you will note vapor coming out from beneath the cover. At this point you will spin the cover and turn the burner to the low heat setting. If the cover spins freely this is how you will know that the vapor seal has formed. After a few minutes you will no longer note the vapor escaping beneath the lid and therefore the appropriate cooking temperature has been reached.
- Only remove the cover at the end of the cooking time to check that what you are cooking is done. If it isn’t done you will need to add 1-2 tablespoons of water and return the heat setting to medium. You will then repeat step #4.
Seems simple enough! But I will say that it will take a couple tries to figure out your settings on your stovetop. I will also share some tips and tricks I have picked up along the way that will make your waterless cookware so much easier to use!
- Fresh fruits and veggies have enough moisture in them naturally that you won’t need to add any further water. This definitely seems so strange, but it’s true! What you will want to do is put the fruit/veggie in the appropriate sized pot. Cover it in water, and then pour the water back off. That small amount of moisture will be enough for most. Meats will also typically only require their own juices to cook in. Only add oils/fats if the recipe requires it.
- Once you have your pan set to low/medium for 3-5 minutes then you can test the pan to see if it’s hot enough by dropping some water in the pan. If it splatters it’s not hot enough, but if the drops of water bead up and dance across the pan you know it’s hot enough.
- When cooking using 360 Cookware if you note that vapor continues to escape the pot (in Step #2 from above), you have a heat setting too high and you will need to reduce the heat
- Also, when cooking and checking for the vapor seal, if the cover doesn’t spin freely and is locked in place that tells you the heat setting is too low and you will need to the raise the heat so the lid will loosen.
- Avoid lifting the cover when cooking as this will let the heat and moisture out.
- While these pans are very durable, you will still want to take great care of them so they will last you for years to come!
- Do not clean with Chlorine Bleach, rather use water and a non abrasive stainless steel cleaner to make a paste (can be as simple as using baking soda as the cleaner).
- Avoid hitting the the rims of the cookware with metal kitchen utensils.
- Do not cut or chop in the pan.
- Don’t allow undissolved salt to remain in the pan for longer periods.
- Don’t allow acidic or seasoned food to remain in the pan for long periods.
Trust me, once you get the hang of waterless cookware you will love it! You can check out all of 360 Waterless Cookware here and use code gurlgonegreen25 to save 25% on your purchase! Share with me below, what do you think of cooking with waterless cookware?
If you liked this post, check out these past posts:
References:
- Mori, Mari; Atsumi Hamada; Hideki Mori; Yukio Yamori & Kinsuke Tsuda. (2012). Effects of cooking using multi-ply cookware on absorption of potassium and vitamins: a randomized double-blind placebo control study. International Journal of Food Sciences & Nutrition, 63 (5): 530-536. https://www.ncbi.nlm.nih.gov/pmc/articles/PMC3411121/
- Why 360 Cookware? (n.d.) 360 Waterless Cookware. Retrieved from: https://www.360cookware.com/pages/why-360-cookware


0 Comments